GPU Water Block 2026: RTX 5090 and RTX 5080 Buyers Guide
Choosing the right GPU water block in 2026 is one of the most impactful upgrades you can make for an RTX 5090 or RTX 5080. With peak power draw hitting 600W on the RTX 5090 under load, stock cooling solutions leave significant performance on the table. A custom GPU water block unlocks the full potential of your card — lower temperatures, higher sustained clock speeds, and measurably better benchmark performance.
This guide covers everything you need to know about choosing the right GPU water block for your RTX 5090 or RTX 5080 in 2026, backed by independent benchmark data from KitGuru’s head-to-head comparison testing.
About the NVIDIA RTX 5090 and RTX 5080
The NVIDIA GeForce RTX 5090 is NVIDIA’s flagship Blackwell architecture GPU, featuring 32GB of GDDR7 memory, 21,760 CUDA cores, and a 575W TDP — making it the most powerful consumer graphics card ever released. Designed for 4K gaming, content creation, and AI workloads, it represents the absolute ceiling of consumer GPU performance in 2026.
The NVIDIA GeForce RTX 5080 sits just below it — 16GB GDDR7, significantly lower power draw, and a more accessible price point while still delivering flagship-tier gaming performance. For most enthusiast builders the RTX 5080 represents the better value proposition within the high-end segment.
Both cards are available in multiple board partner variants. This guide covers GPU water blocks for the two most popular custom designs — the Asus ROG Astral RTX 5090 and Asus ROG Astral RTX 5080 — as well as the NVIDIA Founders Edition reference design for RTX 5090.
Why Install a GPU Water Block on Your RTX 5090 or RTX 5080?

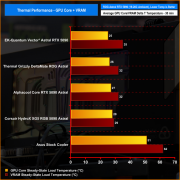
Stock coolers on flagship GPUs are engineered to handle sustained loads within a thermal budget — but that budget limits how hard the GPU can push. In KitGuru’s independent testing, the Asus ROG Astral RTX 5090 running on its stock cooler averaged 51°C over ambient on the GPU core and 62°C on VRAM under a 30-minute sustained load test.
Installing a custom water block dropped those figures to 25°C on the GPU core and 35°C on VRAM — a reduction of 26°C and 27°C respectively. That thermal headroom has a direct impact on performance:
- Higher sustained boost clocks — water-cooled GPUs maintain higher frequencies for longer under load
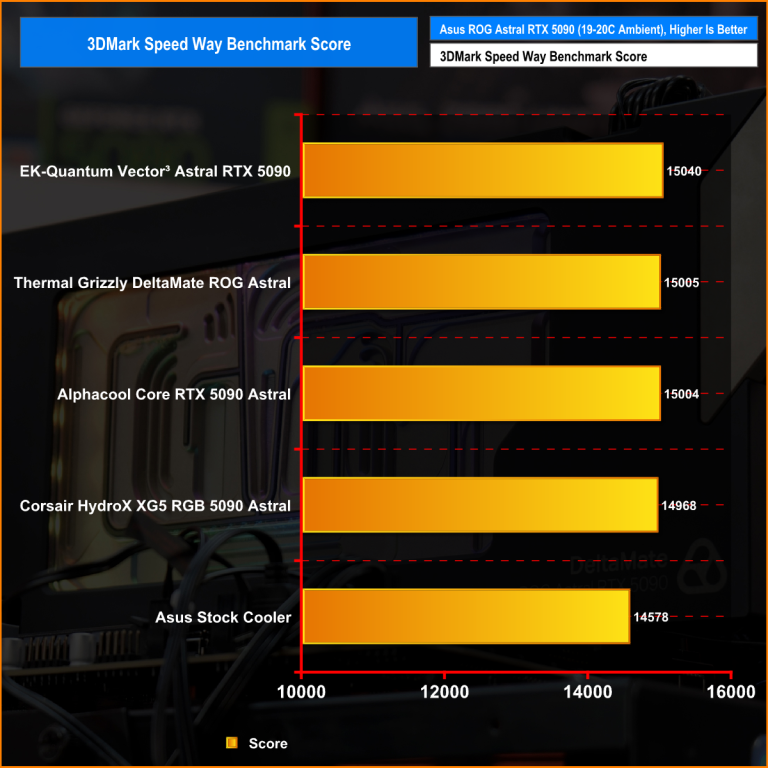
- Better benchmark scores — KitGuru recorded a 462-point improvement in 3DMark Speed Way with a water block installed versus stock cooling
- Lower average power draw — cooler operation means the GPU boosts more efficiently
- Longer component lifespan — lower sustained temperatures reduce thermal stress on VRAM and VRM components
- Quieter operation — radiator fans run slower and quieter than the blower-style or axial fans on stock GPU coolers
For RTX 5090 and RTX 5080 owners looking to overclock, run sustained AI or rendering workloads, or simply extract maximum value from a high-end graphics card, custom water cooling is the most effective upgrade available.
What to Look for in a GPU Water Block
Compatibility
GPU water blocks are not universal. Each block is engineered to match a specific GPU’s PCB layout — the position of the GPU die, VRAM modules, VRM components, and mounting points. A block designed for the Asus ROG Astral RTX 5090 will not fit a Founders Edition or TUF variant, even though both are RTX 5090 cards.
Always verify compatibility before purchasing. EK’s Cooling Configurator at ekwb.com allows you to select your exact GPU model and confirm which water blocks are compatible.
Cold Plate Material
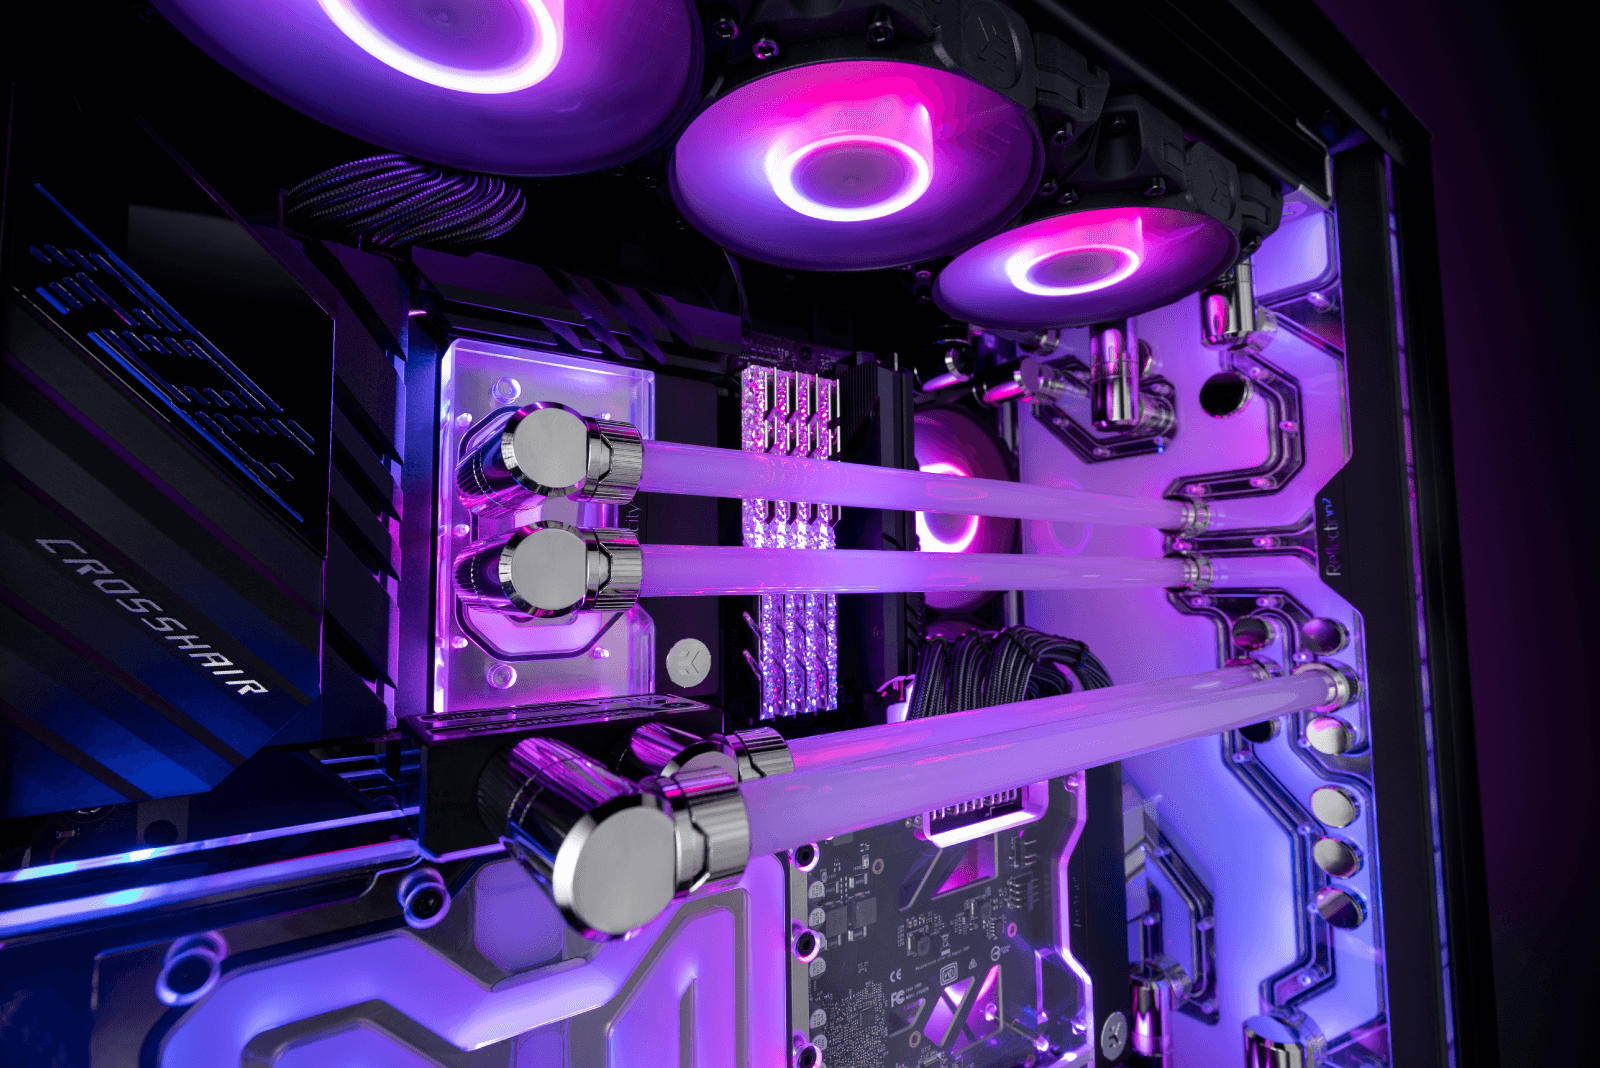
The cold plate is the component that makes direct contact with your GPU die. Nickel-plated electrolytic copper is the standard for high-performance blocks in 2026 — copper provides superior thermal conductivity compared to aluminium alternatives, and nickel plating protects against corrosion within the loop.
Cooling Engine Design
The internal flow path of a water block determines how efficiently coolant is distributed across the cold plate surface. EK’s Open Split-Flow cooling engine distributes coolant uniformly across the cold plate with low hydraulic restriction — meaning it performs effectively even with lower-flow pump configurations and doesn’t require a high-pressure pump to achieve top performance.
Full Coverage vs Core-Only
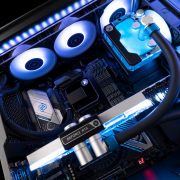
High-performance GPU water blocks in 2026 cover the entire PCB — GPU core, VRAM, power stages, and VRM components simultaneously. Full-coverage blocks deliver significantly better thermal management than core-only designs, particularly on high-power cards where VRAM and VRM temperatures under sustained load can cause throttling.
Loop Integration
Consider how the block integrates with the rest of your loop before purchasing. EK-Matrix7 is EK’s port alignment standard that ensures consistent port positioning and spacing across compatible components. For builders using EK distribution plates or planning a multi-component EK loop, Matrix7 compliance simplifies tube routing considerably.
Terminal orientation matters too — some blocks offer optional pass-through terminals for more flexible routing in complex builds.
Included Accessories
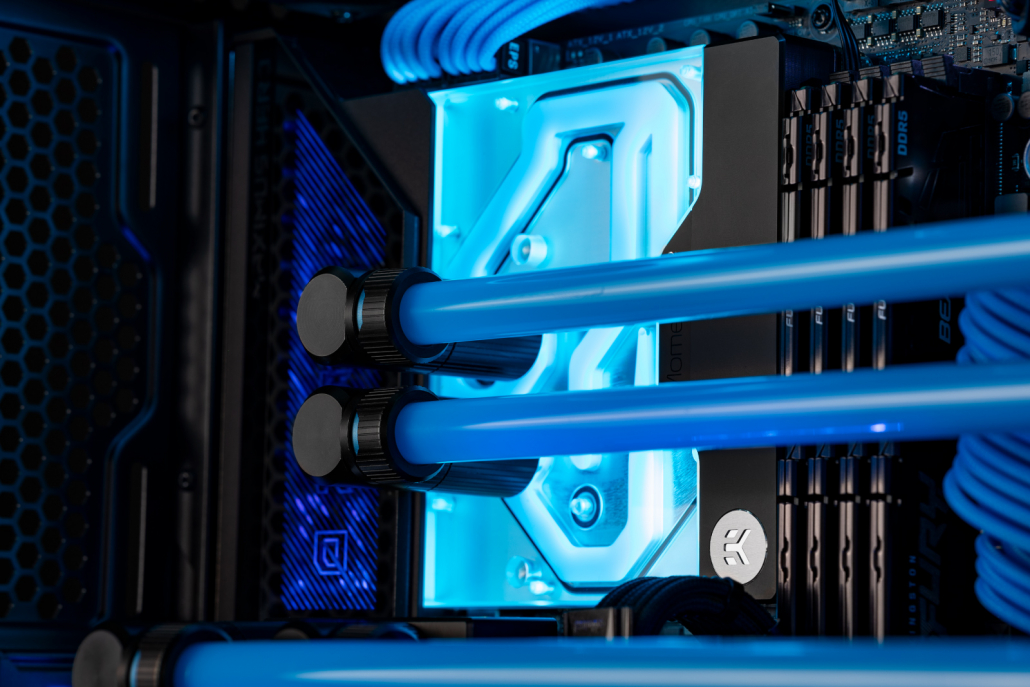
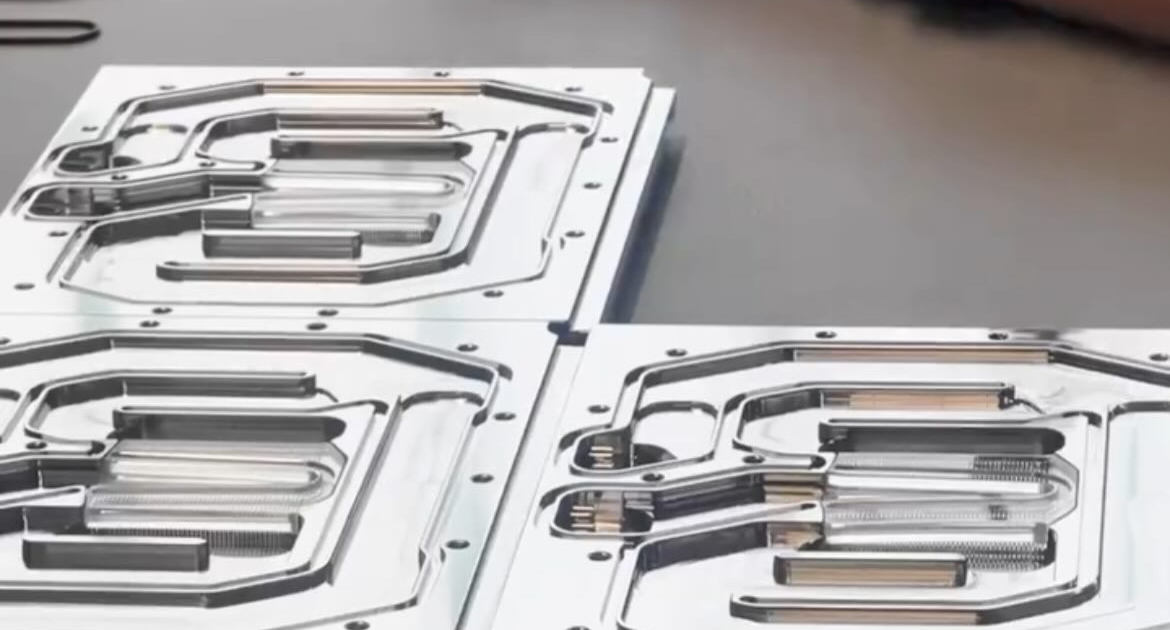
Higher-quality blocks include accessories that simplify installation and improve performance. Look for pre-cut thermal pads, an included backplate, and captive backplate screws. EK Quantum Vector³ blocks include all three as standard.
Best GPU Water Block for RTX 5090 — 2026
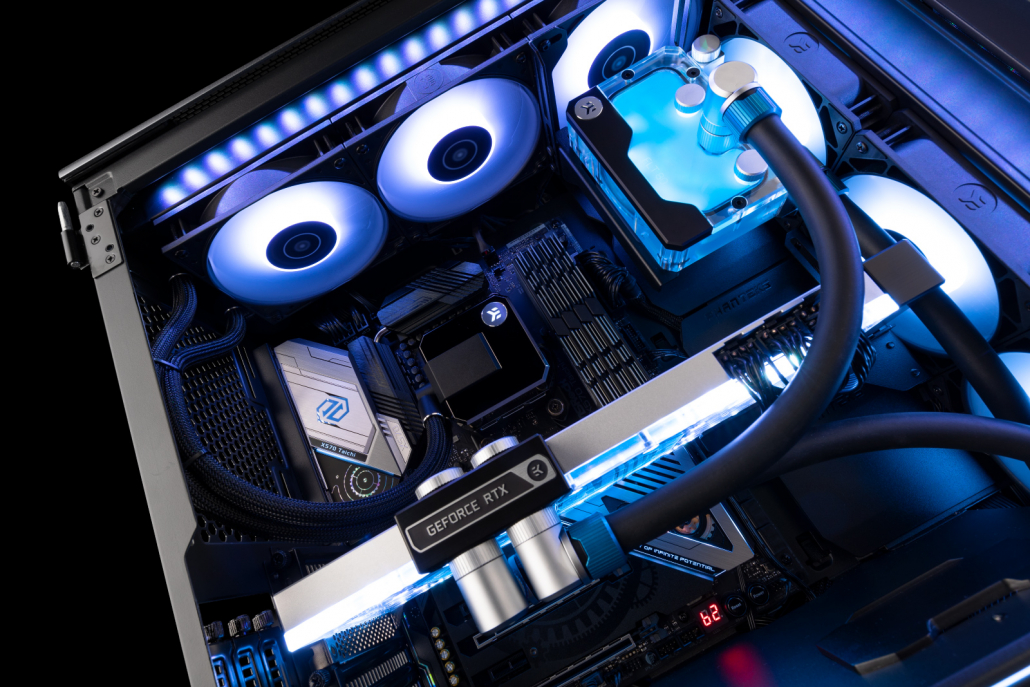
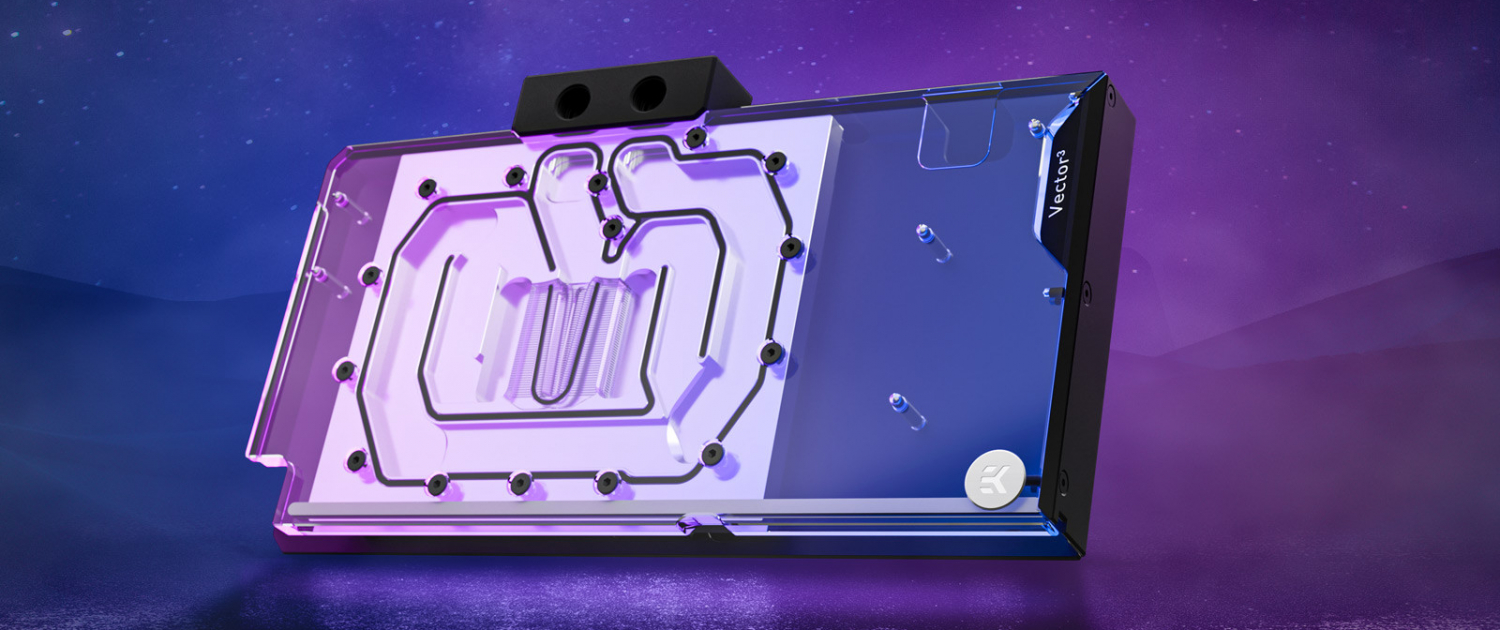
EK Quantum Vector³ Astral RTX 5090
Designed specifically for the Asus ROG Astral GeForce RTX 5090, the EK Quantum Vector³ Astral RTX 5090 is the benchmark-leading water block for this card in independent testing.
In KitGuru’s February 2026 head-to-head comparison against blocks from Thermal Grizzly, Alphacool, and Corsair, the EK Quantum Vector³ Astral RTX 5090 achieved:
| Metric | EK Vector³ | Position |
|---|---|---|
| 3DMark Speed Way Score | 15,040 | #1 |
| GPU Core Frequency | 2,856 MHz | #1 |
| Average Power Draw | 562W | #1 (lowest) |
| GPU Core Temperature | 25°C delta | #1 (lowest) |
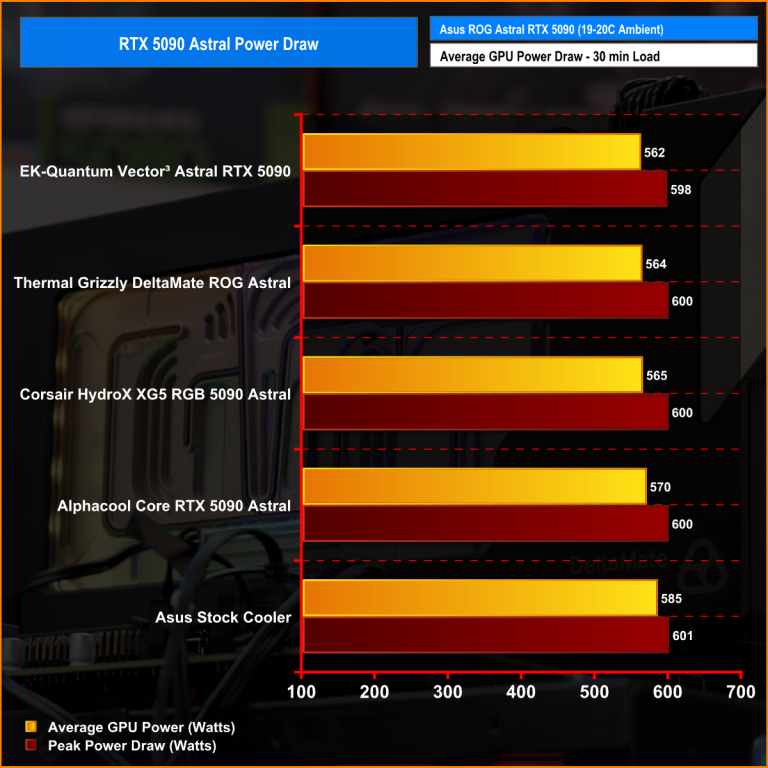
Independent power draw testing by KitGuru — EK Quantum Vector³ achieves lowest average power draw at 562W. Source: KitGuru.net
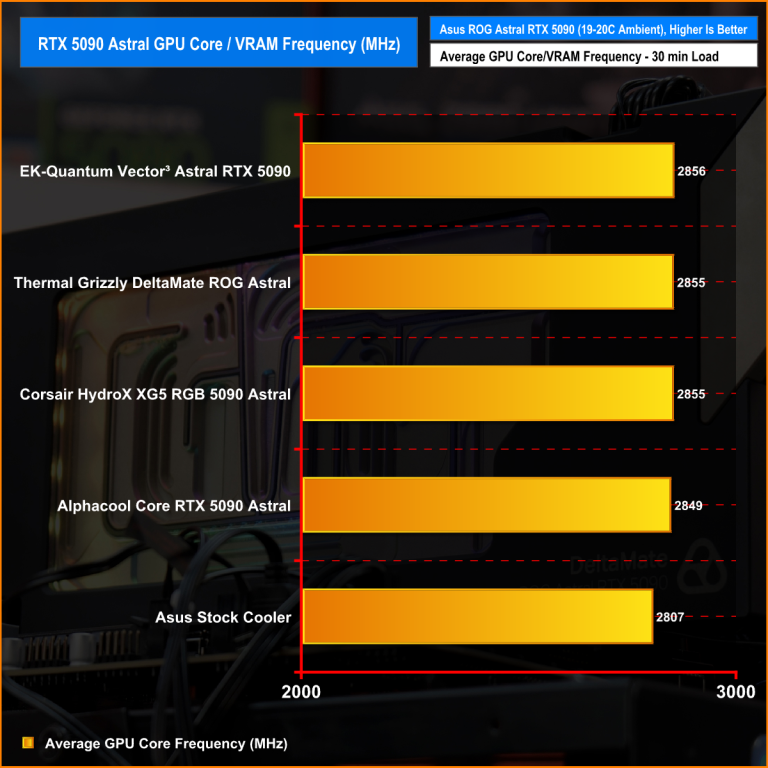
Independent core frequency testing by KitGuru — EK Quantum Vector³ achieves highest sustained frequency at 2,856 MHz. Source: KitGuru.net
The block features an optimised Open Split-Flow cooling engine, nickel-plated electrolytic copper cold plate, CNC-machined cast acrylic Plexi top, D-RGB lighting, and a black anodized aluminum backplate included as standard. It is fully EK-Matrix7 compliant for seamless loop integration.
Shop EK Quantum Vector³ Astral RTX 5090
EK Quantum Vector³ TUF RTX 5090
Engineered for the Asus TUF GeForce RTX 5090, the Vector³ TUF shares the same cooling engine and performance characteristics as the Astral variant, adapted to the TUF series PCB layout. Includes the same Plexi top, D-RGB lighting, and backplate as standard.
EK Quantum Vector³ FE RTX 5090
Designed for the NVIDIA Founders Edition RTX 5090, the Vector³ FE delivers the same benchmark-leading cooling performance for the reference design card. Full-coverage cooling for GPU core, VRAM, and power delivery components with D-RGB lighting and Matrix7 compliance.
Best GPU Water Block for RTX 5080 — 2026
EK Quantum Vector³ Astral RTX 5080
Designed for the Asus ROG Astral GeForce RTX 5080, the EK Quantum Vector³ Astral RTX 5080 applies the same third-generation cooling engine and engineering philosophy as the RTX 5090 block to the RTX 5080’s PCB layout. Full-coverage cooling for GPU core, VRAM, and power stages, with D-RGB lighting and an included backplate.
Shop EK Quantum Vector³ Astral RTX 5080
EK Quantum Vector³ TUF RTX 5080
Engineered specifically for the Asus TUF GeForce RTX 5080, delivering full-coverage cooling with EK-Matrix7 compliance and the same Plexi top and D-RGB lighting found across the Vector³ range.
Shop EK Quantum Vector³ TUF RTX 5080
GPU Water Block Compatibility — How to Check
GPU water block compatibility is non-negotiable. Before purchasing, confirm your exact GPU model — not just the chip, but the board partner and variant. The Asus ROG Astral RTX 5090 and the NVIDIA Founders Edition RTX 5090 use different PCB layouts and require different water blocks.
Use the EK Cooling Configurator to select your GPU and see all compatible water blocks, fittings, and loop components in one place.
Independent Test Results — RTX 5090 Water Block Comparison
KitGuru’s February 2026 independent review tested four GPU water blocks for the Asus ROG Astral RTX 5090 under identical controlled conditions — a 30-minute looped 3DMark Speed Way stress test at 19–20°C ambient. The full methodology, test data, and video breakdown are available at KitGuru.net.
The results confirmed the EK Quantum Vector³ Astral RTX 5090 as the top-performing block across benchmark score, sustained frequency, power efficiency, and GPU core temperature.
GPU Water Block Frequently Asked Questions
Are GPU water blocks compatible with all GPUs?
No. GPU water blocks are designed for specific GPU models and PCB layouts. Always verify compatibility using EK’s Cooling Configurator before purchasing.
Do I need a full custom loop to use a GPU water block?
Yes. GPU water blocks are custom loop components — they require a pump, reservoir, radiator, fittings, and tubing to complete the loop. They are not compatible with AIO coolers.
Does water cooling a GPU void the warranty?
Installing a GPU water block does not typically voids the GPU manufacturer’s warranty as it requires removing the stock cooler. However, we recommend you always check your GPU manufacturer’s warranty terms before proceeding.
How much does it cost to water cool a GPU?
A full custom loop including GPU water block, CPU water block, pump, reservoir, radiator, fittings, and tubing typically costs between £500 and £1,500 depending on component selection. EK offers a 10% discount on whole-loop purchases when all five product categories are added to a single order.
How difficult is it to install a GPU water block?
GPU water block installation requires removing the stock cooler, applying thermal pads to VRAM and VRM components, and mounting the block to the PCB. It is recommended for experienced builders. EK provides full installation guides and video tutorials for all Vector³ water blocks.
Shop EK GPU Water Blocks for RTX 5090 and RTX 5080
- EK Quantum Vector³ Astral RTX 5090
- EK Quantum Vector³ Astral RTX 5080
- Browse all EK GPU Water Blocks
Independent benchmark data sourced from KitGuru’s February 2026 EK Quantum Vector³ Astral RTX 5090 review. Full review available at kitguru.net.