Learn more about EK products
Visit EK Shop
Browse our high performance Quantum, Lignum and Classic product lines, Kits and Accessories.
Fluid Gaming Prebuilt PCs
Not the DIY person? Check out our fully water-cooled prebuilt PCs.

No matter if you are into overclocking or just high performance processors and want lower temps, watercooling is your answer! But this time around, we will focus on how you can actually keep your temperatures as low as possible, and squeeze the best performance out of your processor while overclocking to 5GHz or more with the help of our all-in-one cooling solution!
Step 1: You need an AIO and a PC. We used our flagship EK-AIO Elite 360 D-RGB to cool an Intel i7 10700k planted on an ASUS ROG Maximus XII Extreme motherboard. Once everything is assembled and set up, download the monitoring software. We’ll be using HwiNFO64.
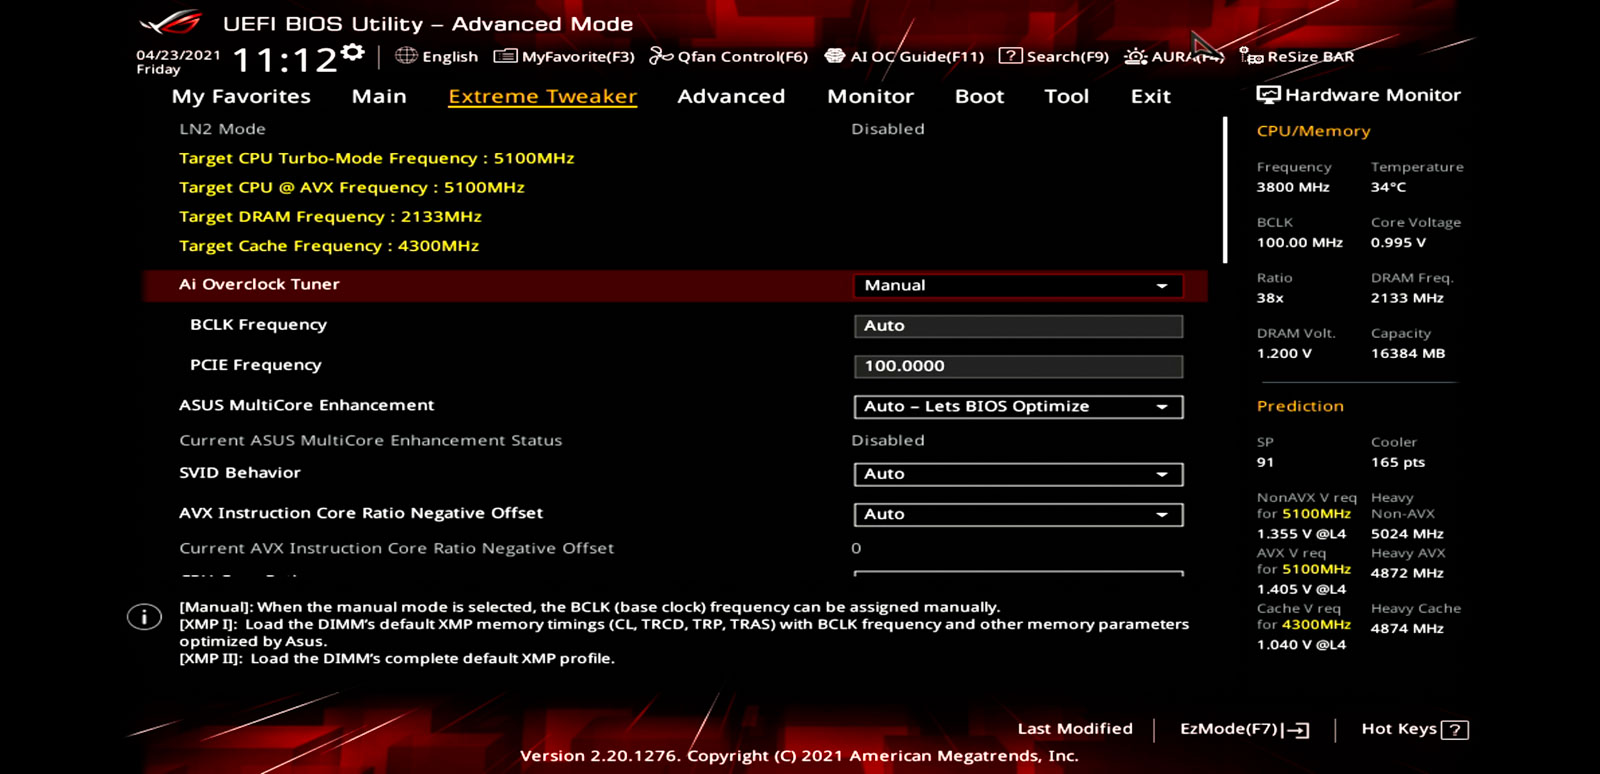
Step 2: Reboot your PC and enter BIOS by pressing the delete key on your keyboard. Select “Advanced BIOS” (press F7 if you’re currently in “EZ BIOS”).
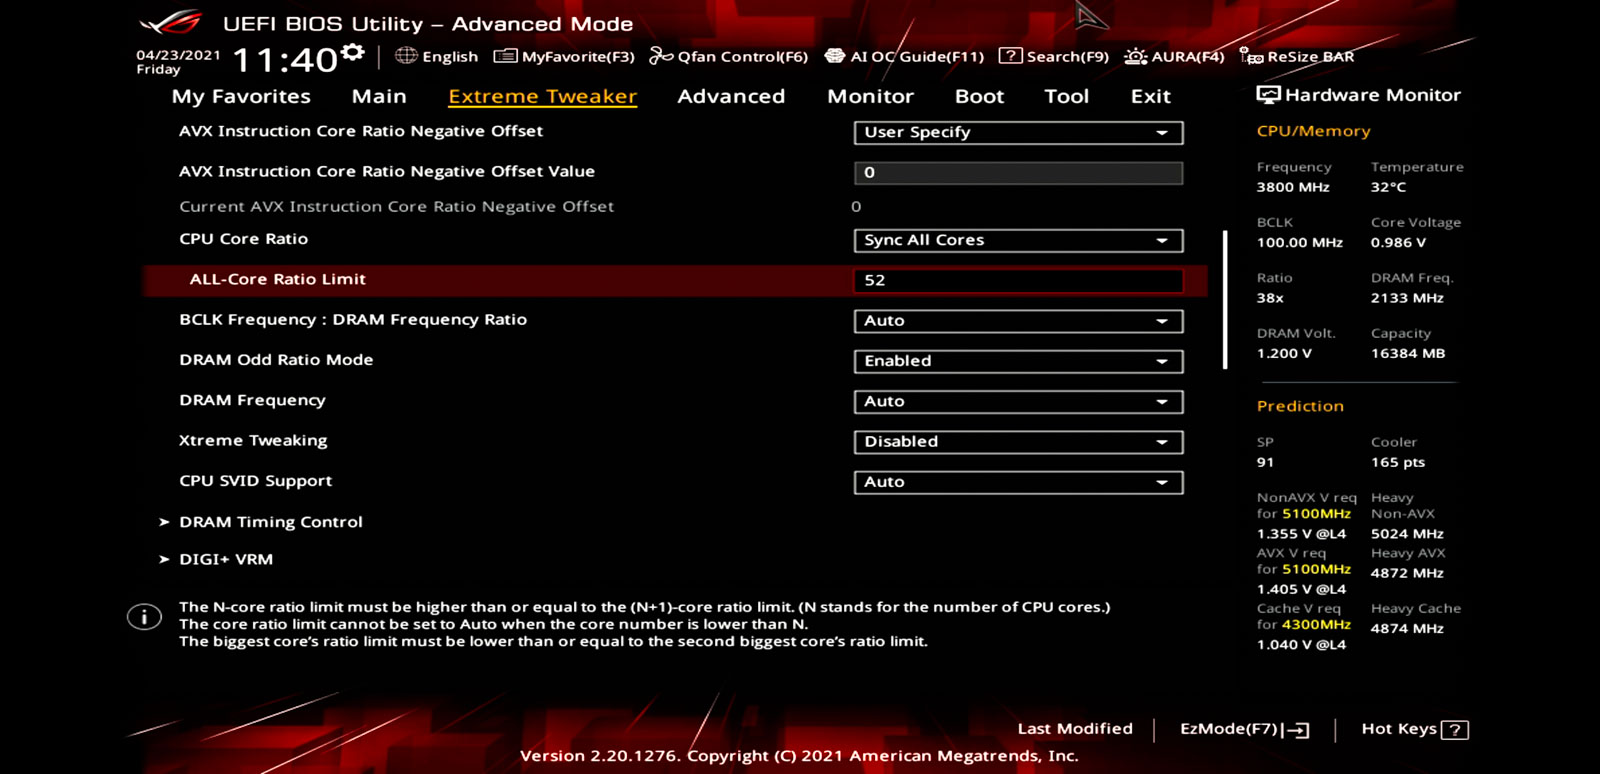
Set Ai Overclock Tuner to Manual and base clock rate (BCLK Frequency) to 100 MHz.
Do not turn on your XMP profile just yet – when stress testing the CPU we don’t want any potential memory instability, which could happen with XMP profiles. Therefore, we enable XMP once the CPU is stable.
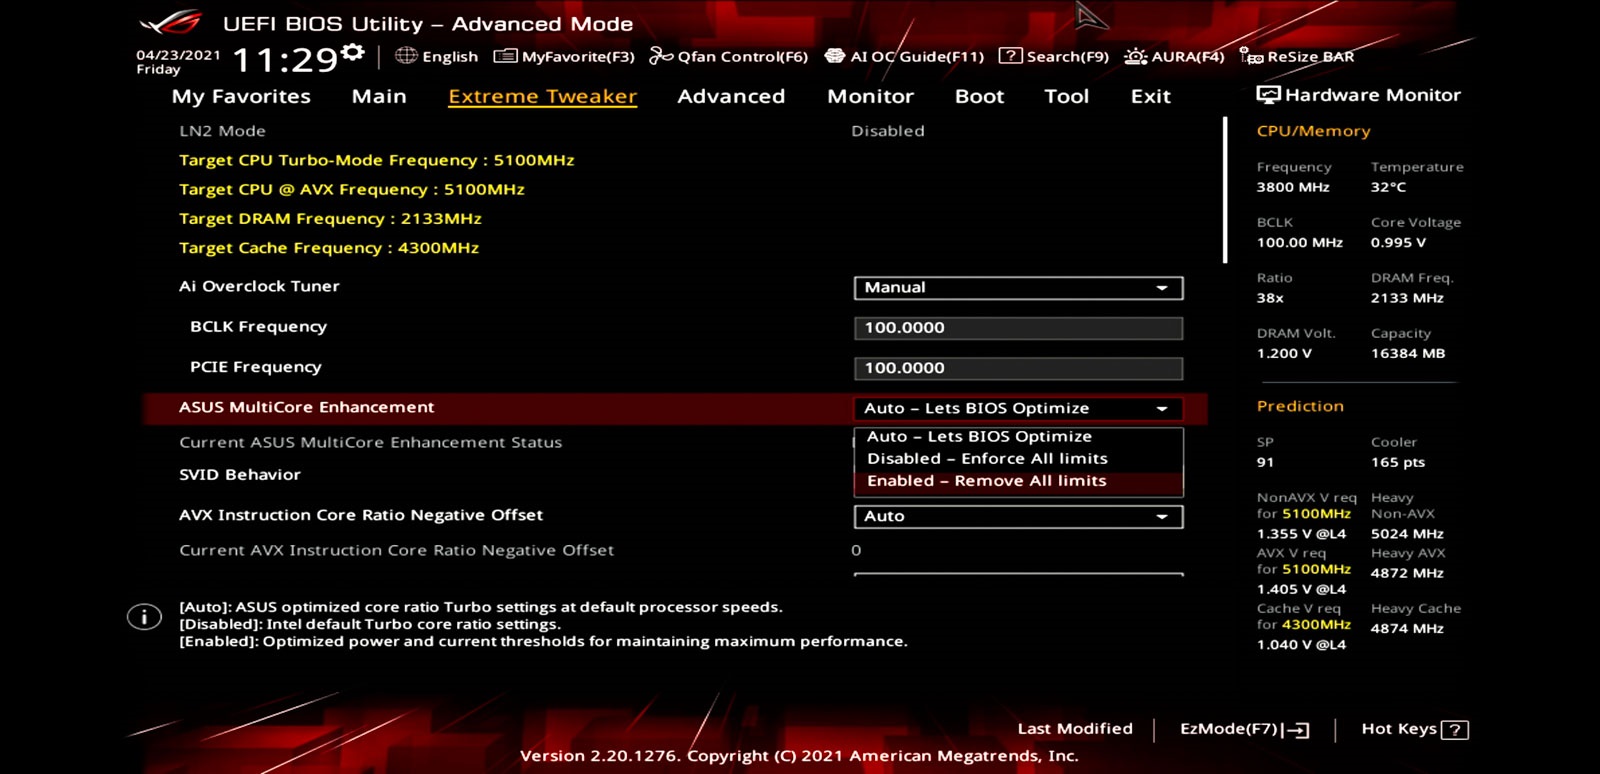
Select “Remove all limits” in ASUS MultiCore Enhancement options – this is needed for manual overclocking.
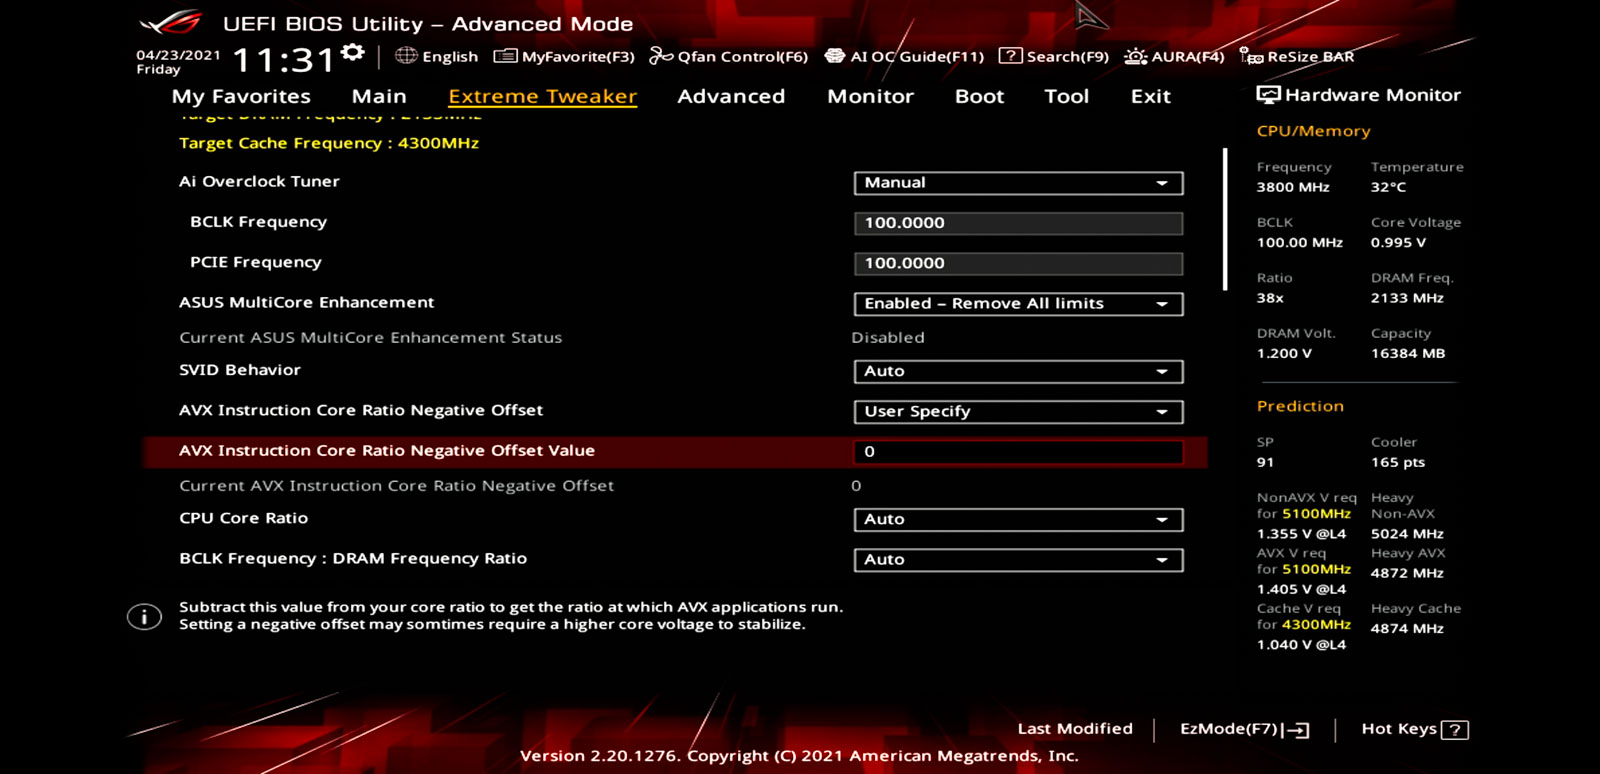
Remember to change AVX Instruction Core Ratio Negative offset to 0.
We won’t get into too much detail regarding these settings as it requires additional testing. This is a simple overclocking guide meant for beginners, so we will keep it simple.
Step 3: Decide on the targeted frequency – in our case this is 5.2GHz so we insert a ratio of 52. (For 5GHz overclock we insert 50, for 4.9GHz overclock we insert 49, and so on…)
*Reminder*
Not every chip can perform the same, as some will perform better than others. Also, a higher binned chip will overclock higher than a lower tier one. For example, the expected overclock from an i9 will always be higher than that of an i5 and i7; however, you might push some individual chips higher. This depends on your silicon lottery luck, as well as the motherboard and PSU of your choice along with the cooling solution.
Our pre-tested i7 10700K can be pushed quite hard, so we let it rip and went to 5.2GHz all core overclock, which was stable in prime95 AVX2 torture test. Keep in mind that not all 10700K(s) will be able to achieve this frequency at safe voltages, but we estimate that most can be pushed to 5.1GHz.
Why even overclock? The most straightforward answer would be to get the highest stable clock speed with the lowest load-line calibration setting and lowest possible voltage while keeping temperatures in the safe zone.
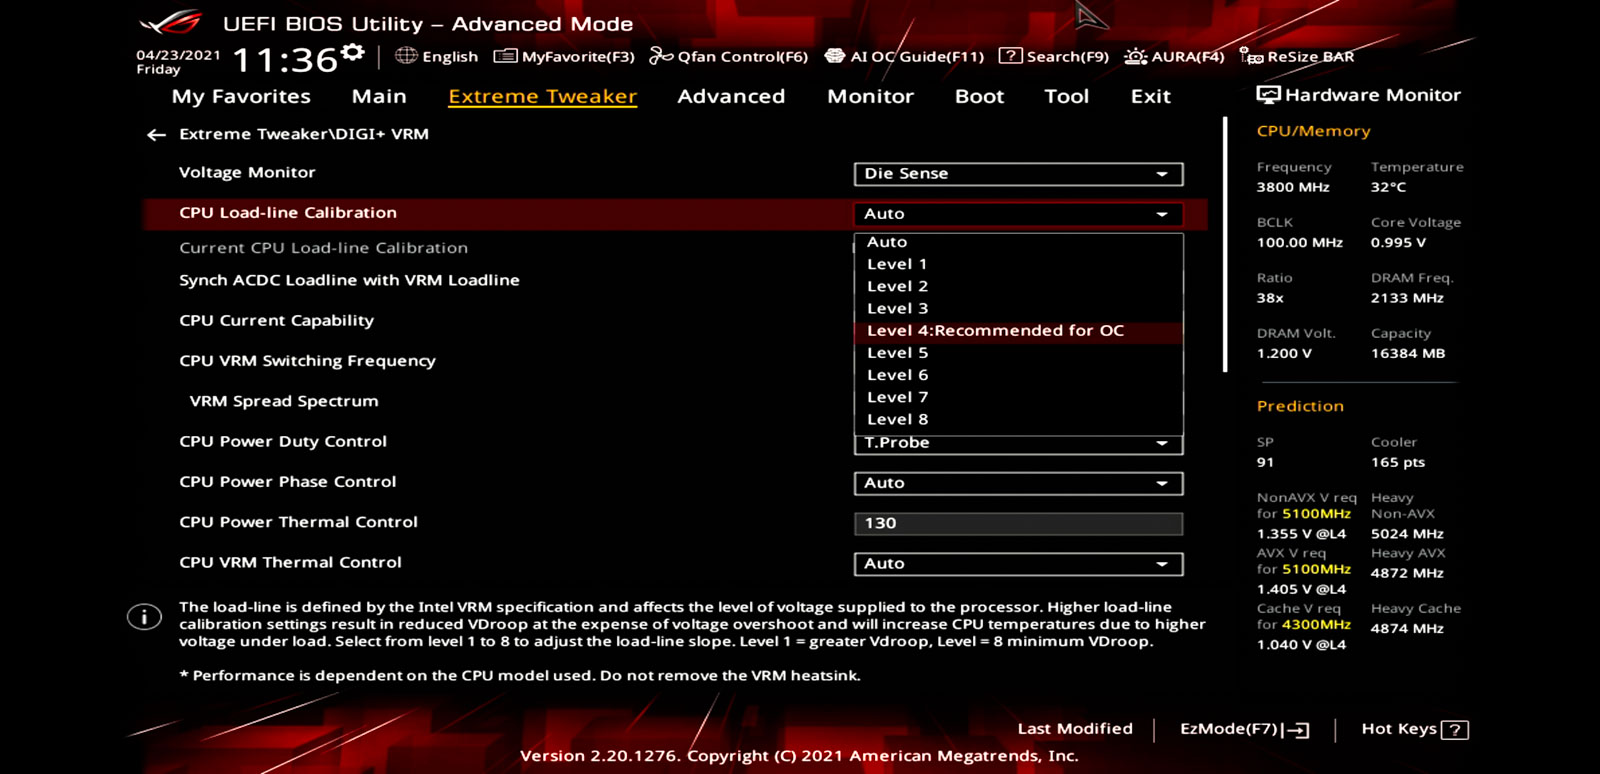
Step 4: – Digi+ VRM settings:
Set Load-Line Calibration (LLC) to a medium setting, in our case LLC level 4. We would advise against extremely high LLC settings, but anything up to the midrange setting is safe for the longevity of our chip. Higher LLC settings may help with system stability but it can also reduce the lifespan of CPUs due to voltage overshoot, so we suggest keeping it at around level 4 for overclocking.
Step 5: After setting the LLC to a starting point, adjust the CPU voltage settings.
Disable BCLK aware adaptive voltage so it won’t interfere with our manual overclock.

Next, we switch the CPU Core/Cache Voltage from Auto to Manual Mode (Fixed mode) and insert the desired voltage.
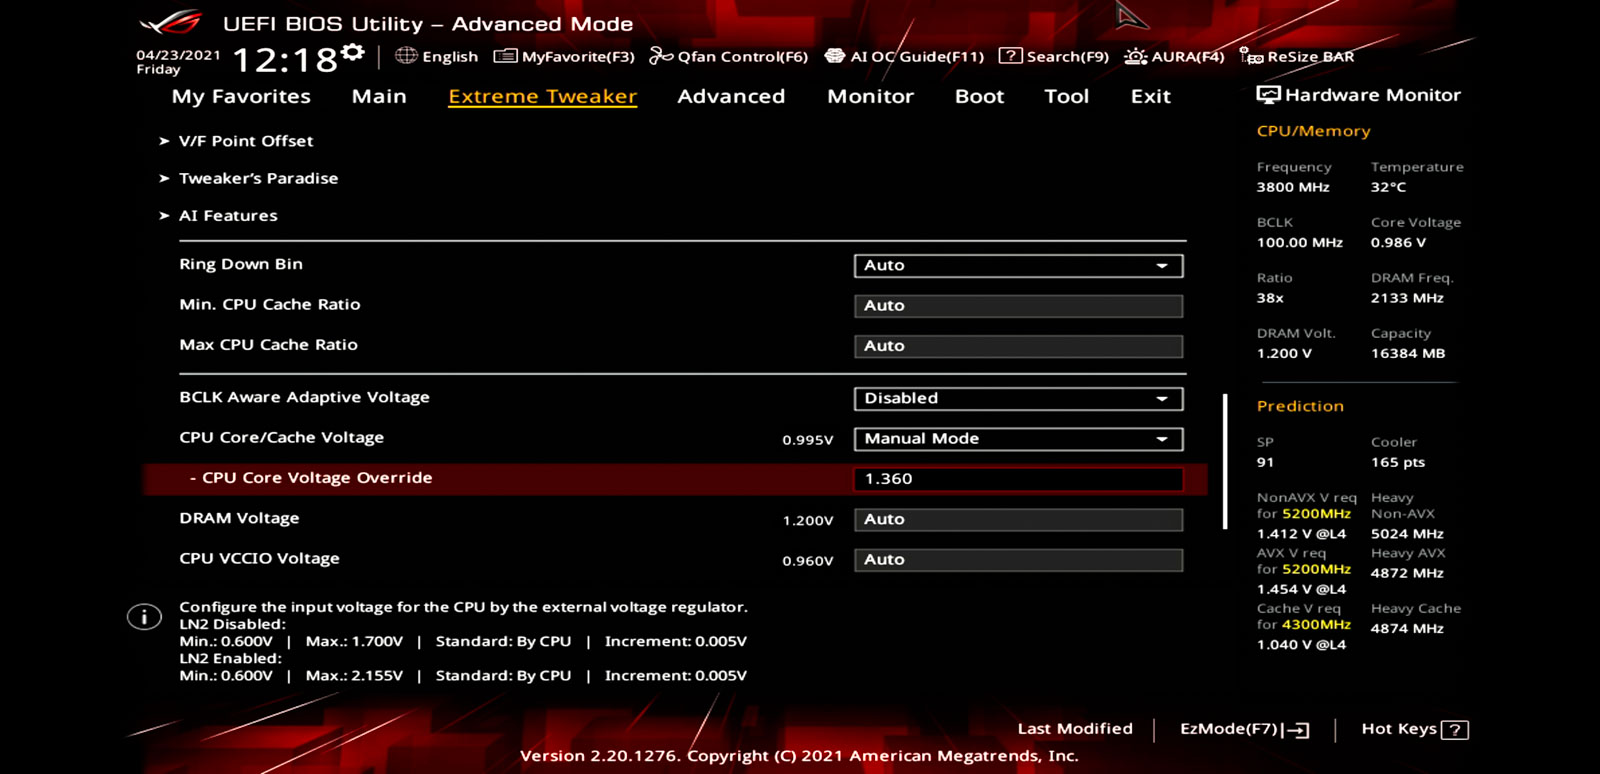
Here we already have stable settings, but you should start at around 1.25V and lower core clock and work your way up from there. For example, after you manage to have your system stable at 5GHz, increase its speed to 5.1 and increase the voltage in small increments (of 10mV) until it’s stable.
Anything below 1.4V is considered safe for daily use with these Intel CPUs. However, as a rule of thumb, it is recommended that you don’t push it much past 1.38V, as the software readouts aren’t 100% accurate and we prefer to keep it on the safe side for daily use.
Remember to save any changes made in BIOS before rebooting by pressing F10.
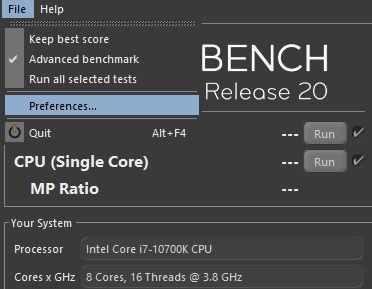
Step 6: Always stress test the system. You don’t want your PC randomly rebooting in the middle of your gaming session. You can use any of the stress tests available. We suggest Cinebench R20 or R23 for stress testing your PC for gaming. We recommend stressing your PC for at least one hour to check for any instability. If the system crashes during a stress test, adjust your voltage settings and try again.
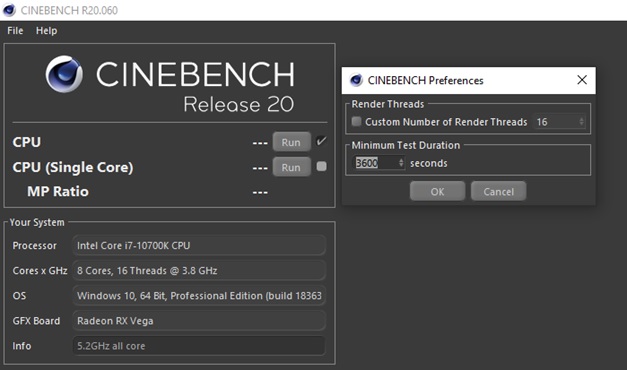
To keep Cinebech running continuously, check Advanced benchmark settings and open preferences.
Here you can set the test duration to a desired length.
Advanced use:
If you want to stress test your CPU to it’s maximum limit, we suggest using the prime95 torture test, but stability for this test requires significantly higher voltages and will also result in higher temperatures. Keep in mind that your PC can be stable for daily/gaming use while not being stable in prime95, as this stress test puts your CPU under the most extreme load, which rarely happens in the vast majority of applications.
And remember:
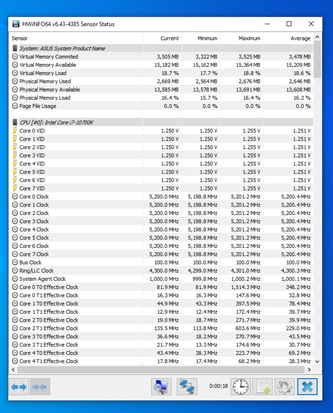
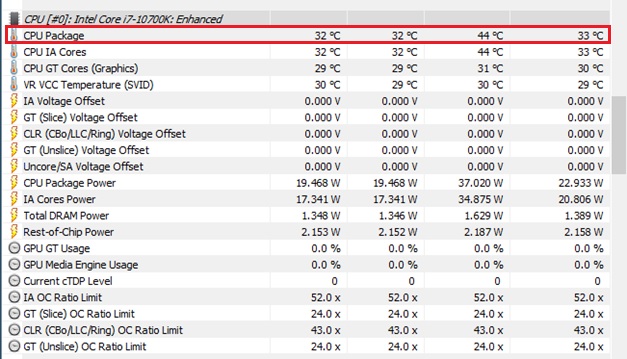
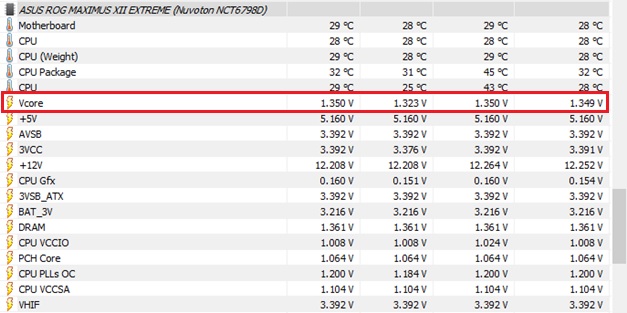
You should keep your CPU temperature under 100°C at all times and your Vcore under 1.4V when the system is under load – no need to worry about idle voltage. You can find the sensor readouts in HWiNFO64:
For CPU temperature monitoring, check the Enhanced section of HWiNFO64, namely the CPU Package.
This should never exceed 100°C.
The second important thing to monitor is Vcore value. This should never exceed 1.4V.
After confirming system stability with stress tests you may finally enable XMP profile in BIOS and log into your favourite game.
Enjoy!
Get the most out of your liquid cooling experience. Learn the latest EK news and water-cooling tips and tricks, or share your thoughts with our team and other enthusiasts.


 How To Choose the Right AIO Cooler?

